Showing posts with label Fix. Show all posts

Recovery Grub After Installing Windows In Ubuntu 10.10 (Maverick Meerkat)

Has long this blog is not updated, I'm sorry I did not get to take care of this blog, now I promise, I will continue this blog for this blog is not abandoned.

In this time we will discuse about Recovery Grub After Installing Windows in Ubuntu 10.10 (Maverick Meerkat)
We needed LiveCD ubuntu 10.10.booting from LiveCD, After login, open terminal, login as root by type :

$ sudo su


Find Ubuntu partition by type :

$ fsdisk -l

See examples of partition in the image below :


In the picture above, the linux partition is on /dev/sda1. Create a directory to manipulate your ubuntu using  command :

$ mkdir /media/root
$ mount /dev/sda1 /media/root

If you have successfully mounted directory, then install grub by type :

$ grub-install --root-directory=/media/root /dev/sda

If everything is correct, then there is no error message and that is the message 'finish and no error report ", then reboot your computer by type :

$ reboot

Then you should direct automatically go to ubuntu and grub can not access the windows, go to the ubuntu. open a terminal and login as root and update grub :

$ sudo su 
$ update-grub

Now grub on your ubuntu is fixed.

Happy Testing...!!
Read More...!!

Easy Way Fix Problem Grub Rescue On Windows 7 (Maverick Meerkat) Using Burg Manager

I've had problems with grub ubuntu, when I select the booting windows 7, it turns out there is a message "grub rescue". and I can not boot through windows 7, I finally took the initiative to check it through ubuntu. after I see it, it turns out that the partition in the grub list, is on sda3, however, the partition is on sda2. after I change to use:


$ sudo gedit /boot/grub/grub.cfg

There was still a "grub rescue", after that, I try to update the grub with the command :

$ sudo update-grub

After running the command above, the problem has not been fixed, and still can not boot windows 7. Then i try to delete grub ubuntu, go to grub rescue on windows 7 :

bcdedit /export C:\BCD_Backup
C:
CD Boot
Attrib bcd –s –h –r
ren c:\boot\bcd bcd.old
bootrec /RebuildBcd 

Then appear Messages :

“Scanning all disks for windows installations.
Please wait, since this may take a while…
Successfully scanned windows installations: 1
[1] C:\windows
Add installations to boot list? Yes(y)/No(N)/All(A) : “

And Press Y Enter

Then  : 

bootrec /fixmbr 
bootrec /FixBoot

After Finished, Grub is gone, but still can't booting from Window 7. Now, i finaly found solution from this problem.

Install Burg Manager.  from here or here, after installing burg manager, you will see message, An explanation more or less like this:  " i can fix this problem, problem is fixed "

Then you can booting from Windows 7. i finally found this solution by two day.
Read More...!!

Restore Default GNome Panel in Ubuntu Lucid Lynx (10.04)

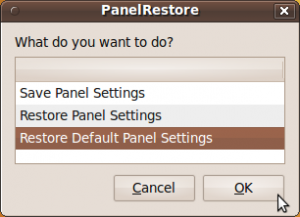
An easy way to restore gnome-panel in ubuntu Lucid Lynx is to use the restore panel program, which is a small scripting program that can help you to restore gnome panel by default. to restore this panel, you can download here

When finished downloading, extract the file, then double-click, the selection window will appear. select "Run" 


Select "restore defaut setting panel" then press OK. Gnome panel will change by default the same as when you first install. if there is still no change, restart your computer. good luck
Read More...!!

Grub Recovery Ubuntu Maverick Meerkat (10.10)

I have been not updating this blog, after all this time, I will discuss about how to recover the damaged 10:10 grub ubuntu after installing windows. what we need is ubuntu LiveCD version 10:10, just go ahead. booting from the LiveCD and open a terminal, entered as a user with the command :

$ sudo su

Find the location of the partition ubuntu by type :

$ fdisk -l

As an example, look at the picture below:


The position of the ubuntu partition is located at /dev/sda1. make a directory to install grub :

$ mkdir /media/root

Mount ubuntu partition /dev/sda1 to /media / root by type :

$ mkdir /media/root

Once completed, then install grub with the command :

$ grub-install --root-directory=/media/root /dev/sda

If the steps above are correct, it will display the message "finished", now reboot your system then you will login in ubuntu and no grub ption to login in windows. after you login in ubuntu. open terminal and login as root bty type :

$ sudo su

Update grub by type :

$ grub update

Now, grub has been recovered. happy Testing..
Read More...!!

Install GConf Cleaner to Clean Up GConf key On Ubuntu Lucid Lynx (10.04)

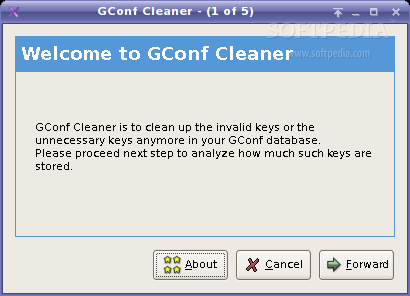
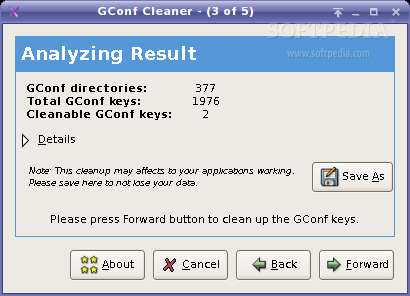
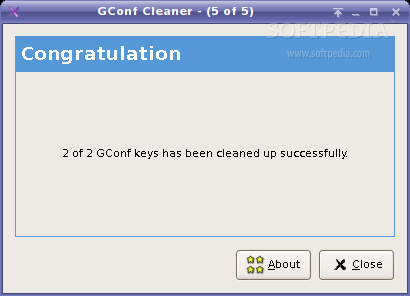
GConf Cleaner project is a cleaning tool for GConf. GConf Cleaner is to clean up the unknown/invalid gconf keys that still sitting down on your gconf database You may want to keep a clean your GConf database. this tool might help you in this case. Now we will install packages using ubuntu software, now go to Applications > Ubuntu Software Center. then type on search box : "gconf cleaner" then install it.

If have finished, now run gconf cleaner go to : Applications > System Toll > Gconf Cleaner :

Follow step by step this application and dont forget to back up gconf key first, and other way to install it, you can download here


Happy Testing...!!
Read More...!!

Recover Network Manager Applet in Ubuntu

Have you ever had a network manager applet on the panel missing?, if it missing we have trouble to easy connect to the internet. here to recover it go to terminal then :


Type this :

$ nm-applet –nm-disable

Then :

$ nm-applet –nm-disable &

Now you can see network manager applet, if you not see it. please reboot your machine.
Happy Testing....!!
Read More...!!

Reset MySQL Password In Ubuntu

I have forgoten MySQL password on myy ubuntu, then i found this post. it is very helpfull. to reset MySQL password in ubuntu. but you must open two windows termnial, go to terminal, on terminal 1 login as root then stop MySQL service by type :


$ sudo su
$ sudo /etc/init.d/mysql stop

Now go to terminal 2 dont forget login as root then activate MySQL service by type :

$ sudo su
$ sudo mysqld –skip-grant-tables

Back to teminal 1  run MySQL client :

$ myql
$ mysql> use mysql;

Now change password by type query :

$ mysql> update user set Password=password(‘NewPassword’) where User= ‘root’;
$ mysql> flush privileges;

Stop MySQL service on terminal 1 :

$ sudo killall mysqld

Now activate again MySQL service on terminal 1 :

$ /etc/init.d/mysql start

Now you can run new MySQL password.
Sources : http://adhit.web.id/reset-password-root-database-mysql-di-linux/
Happy Testing....!!
Read More...!!

Remove Old Kernel Linux-Image in Ubuntu Karmic Koala (9.10)

When we upgrading kernel or linux images, the oldest kernel does not remove automatically. So that when we boot or start ubuntu, grub will appear on the new kernel and the old kernel so that it meets the grub display and can be very disturbing view of grub. to remove it,  follow these steps: 


Login as root and view oldest kernel grub you want to remove by type :

$ sudo su


$ dpkg --get-selections | grep linux-image

And will appear :

linux-image-2.6.31-13-generic
linux-image-2.6.31-14-generic
linux-image-2.6.31-15-generic

Now remove oldest kernel by type :

$ apt-get purge linux-image-2.6.31-13-generic

Or

$ apt-get remove linux-image-2.6.31-13-generic

Restart your machine and oldest kernel have been removed.

Happy Testing...!!
Read More...!!

Wireless Driver Problems On Compaq CQ40 in Ubuntu Karmic Koala (9.10)

In fact when we use the ubuntu using live-CD on Compaq CQ40 no problem has found, especially in broadcom  wireless drivers, but once installed on the Compaq CQ40 wireless is not detected, probably at the time of installation is'nt installed, Compaq CQ40 used device is the product of broadcom. to install broadcom wireless drivers, there are two ways that online or offline.

Online Installation :

You must connected to internet by wired connection/dial up, to install it just login as root and update repositoy by type :

$ sudo su

Update repository :

$ apt-get update

Reinstall broadcom wireless driver by type :

$ apt-get install --reinstall bcmwl-kernel-source

Finish, restart your machines and views changes.
Offline Installation :

In the installation process is offline, we need a DVD ubuntu repository, add the repository insert DVD, go to terminal add repository by type :

$ apt-cdrom add

doing same way to all DVD repository and update

$ apt-get update

Reinstall broadcom wireless driver

 $ apt-get install --reinstall bcmwl-kernel-source

Happy Testing....!!
Read More...!!

Solve Amarok Problem On Ubuntu Karmic Koala (9.10)

Amarok is the best music player application on linux operating system, including ubuntu, but in this version, amarok have a little problem, after the application is installed by default can not play music even though the codec is a multimedia/gstreamer is already installed. turns out this problem because there is a package that has not been installed, do not know why? this package is not installed directly at the installation process, the package is needed is:


libxine1-ffmpeg

after the problem is found, we only install the package using terminal n login as root by type :

$ sudo su
$ apt-get install libxine1-ffmpeg

Finish...!!

Open amarok and lets play your favourite music and happy testing...!!
Read More...!!

Disable Splash Screen On Ubuntu Karmic Koala 9.10


Splash screen in ubuntu  Karmic koala 9.10 cause slow effect  boot time on your ubuntu machine, and one to accelerate one of ubuntu you can disable your ubuntu splash screen, to do that, follow these steps:

Login as root by type :


$ sudo su
$ gedit/etc/default/grub

Find this line :

GRUB_CMDLINE_LINUX_DEFAULT="quiet splash"

Remove "quiet splash" to be:

GRUB_CMDLINE_LINUX_DEFAULT=" "

Then exit and save, and update your grub by type :

$ update-grub

Happy Testing.....!!!
Read More...!!

Install Driver Canon iP1300 in Ubuntu Manually

In general, the existing printer driver on ubuntu, and we can immediately install the System administration. but many features the printer does not work properly, and it causes our printer does not work properly.Here there is another way to install the printer driver manually.

to install it we follow these steps, login as root by type :


$ sudo su
$ apt-get install alien

Download driver canon ip1300 here. then extract file .tar.gz have you downloaded by type :


$ tar -xf iP2200_Linux_260.tar.gz

Delete the file. rpm which we do not need, search for files cnijfilter-common-2.60-1.src.rpm by type

$ rm -r cnijfilter-common-2.60-1.src.rpm

Go to active directory to convert file .rpm to .deb by using alien application by type :

$ alien -d -c *.rpm

then intall file .deb that converted by type :


$ dpkg -i *.deb

To install this driver we need additional packages from the repository libgtk1.2, by type :

$ apt-get install libgtk1.2

Create links between files to be more information type : "$ man ln'"

$ ln -s /usr/lib/libpng12.so.0 /usr/lib/libpng.so.3
$ ln -s /usr/lib/libxml2.so.2 /usr/lib/libxml.so.1
$ ln -s /usr/lib/libpng12.so.0 /usr/lib/libpng.so.2
$ ln -s /usr/lib/libtiff.so.4 /usr/lib/libtiff.so.3


default configuration ip2200.ppd still able to work, following only improve the results of your printer, Make your choice as the level of detail you need by type :

$ gedit /usr/share/cups/model/canonip2200.ppd


*OpenUI 
*CNQuality/Quality: PickOne
*DefaultCNQuality: 3
*CNQuality 2/High: "2"
*CNQuality 3/Normal: "3"
*CNQuality 4/Standard: "4"
*CNQuality 5/Economy: "5"
*CloseUI: 
*CNQuality
*OpenUI 
*Resolution/Output Resolution: PickOne
*DefaultResolution: 600
*Resolution 600/600 dpi: "<>setpagedevice"
*Resolution 1200/1200 dpi: "<>setpagedevice"
*Resolution 2400/2400 dpi: "<>setpagedevice"
*CloseUI: 
*Resolution

Restart cups by type :

$ killall cupsd
$ cupsd

Add your new printer

Open printing dialog in system settings
Add new printer
Choose Canon IP1300 USB # entry
When asked choose to manually choosea PPD file
browse to /usr/share/cups/model/canonip2200.ppd
Apply all settings and close wizard.

At this step, your printer is ready to work, but can’t print black colour except you add black cartridge. The next steps is the steps to make printer simulated the black colour from colour cartridge that was installed.

Go to terminal and edit file canonip2200.ppd by type :

$ gedit /usr/share/cups/model/canonip2200.ppd

and add this line

*OpenUI *CNInkCartridgeSettings/Ink Cartridge Settings: PickOne
*DefaultCNInkCartridgeSettings: color
*CNInkCartridgeSettings color: “Color Only”
*CNInkCartridgeSettings bk: “Black Only”
*CNInkCartridgeSettings bkcolor: “Both Black and Color”
*CloseUI: *CNInkCartridgeSettings


Save and exit text editor, and restart your machine by type :


$ reboot

After restart finished, go to Printer configuration in System>Administrtion>Printing and choose printer options and finish...

Happy Testing...!!
Read More...!!

Change Themes Gnome Display Manager (GDM) in Ubuntu Karmic (9.10)

On ubuntu karamic (9.10) themes Genome Display Manager (GDM) can not be replaced, because the ubuntu Karmic (9.10) default GDM version 2.28 and themes in this version can not be replaced, to replace the ubuntu GDM themes Karmic (9.10) you can change the version GDM 2.28 to 2.20 version that is used by default in ubuntu jautny (9.04). to install it, follow these steps:


Go to Terminal and login as root :

$ sudo su
$ /etc/init.d/gdm stop

The above command is to stop the process running GDM, then install the version of GDM 2.20

$ apt-get install gdm-2.20

when installing gdm version 2.20, 2.28 gdm versions will be deleted and will have problem, to fix it, follow these steps:

$ cd /etc/gdm
$ sudo sed ’s|X11R6/||’ gdm.conf >/tmp/gdm.conf
$
sudo mv /tmp/gdm.conf

Finish, reboot your machine by type :

$ reboot

Enjoy...!!
Read More...!!

Sound Problems on HP Compaq CQ40-401 in Ubuntu Jaunty (9.04)


In the laptop types HP Compac CQ40-401 is generally a problem they have compatible hardware, but the sound is a bit problematic, and to fix the problem follow the steps below:

Go to Application > Accesories > Terminal
login as root by type


$ sudo su
$ gedit /etc/modprobe.d/alsa-base.conf


add this line in text editor :


alias snd-card-0 snd-hda-intel
alias sound-slot-0 snd-hda-intel
options snd-hda-intel model=dell-m4-1
options snd-hda-intel enable_msi=1


Go to System > Preference > Sound
select all for Alsa Sound settings

Go to terminal and type :

$ gedit /etc/group

change this line : 

audio:x:29:pulse

to

audio:x:29:[username],pulse

ex :

audio:x:29:minez,pulse

Save and Reboot your machine by type :

$ reboot

Good Luck...!!
Read More...!!

Pidgin problems connecting to Yahoo in Ubuntu Jaunty (9.04)

yahoo can not be accessed by pidgin internet messenger applications in ubuntu, after searching for the source, the official statement in the Yahoo blog is written as follows:
In an effort to provide the best experience for our users and maintain high security standards, we will officially retire Yahoo! Messenger versions 6.0 through 7.5 in August, 2009. This means that if you are currently using a version of Yahoo! Messenger that is below 8.0, you will no longer be able to sign in and use it after the retirement date in August.

To fix the problem, follow these steps:
For Pidgin Internet Messenger users, upgrade Pidgin Internet Messenger latest version is 2.5.7 which can be downloaded here or you can make changes to the way pager server menu click "Accounts" -> "Manage Accounts" -> select username -> click "Modify" -> Select "Advanced" tab. On Page one of the servers fill below variable :
1. cn.scs.msg.yahoo.com
2. cs101.msg.mud.yahoo.com
3. 66.163.181.189
4. 66.163.181.106


Happy Testing....!!!
Read More...!!

Solution "cannot mount volume" for ntfs Partition in Ubuntu


For users who use a dual OS ubuntu and windows, often in ubuntu when you mount the volume will appear error message "can not mount volume" well then we are confused, why and how to resolve the issue.

the problem is usually due at the time drew no removeable disk using remove safety in the windows, and to overcome these problems we follow these steps:
One way is to manually force mount, another option is to use a tool called ntfsfix where you can use to make pengesetan on the NTFS log file as unused. To overcome this, the following tips and tricks:
Install application ntfsprogs by type :

$ sudo su
$ apt-get install ntfsprogs

Determine the NTFS partition to be cleaned his log to be mounted by typing the following command on terminal :

$  fdisk -l
Disk /dev/sdb: 160.0 GB, 160041885696 bytes
255 heads, 63 sectors/track, 19457 cylinders
Units = cylinders of 16065 * 512 = 8225280 bytes
Disk identifier: 0×44fdfe06

Device Boot Start End Blocks Id System
/dev/sdb1 1 257 2064321 7 HPFS/NTFS
/dev/sdb2 258 19457 154224000 83 Linux

Then to find out where the NTFS partition it, go to terminal type the following command: (example on the partition / dev/sdc1) 

$ ntfsfix /dev/sdc1

After log NTFS cleaned, you can mounting volume by clicking 2 times on the drive that will be mounted

Happy Testing...!!
Read More...!!

Recover Gnome Desktop Panel On Ubuntu Jaunty (9.04)


 In this post I will explain how to recover a broken gnome panel, or not appear at all on your ubuntu desktop. gnome panel damage usually occurs due to user error when using gconf-editor, not intentional or due to a failed update ubuntu.
to repair it follow these steps :
Go to terminal, or press alt+F2 :

$ sudo su

Go to Home directory by type :

$ cd home

and remove your Gnome desktop setting by type :

$ rm -rf .gnome .gnome2 .gconf .gconfd

reboot your ubuntu by type :

$ reboot  

restart your ubuntu and look results.....!!
Read More...!!

Hiding Secret Data in Bad Block Partition in Ubuntu

When the hard disk was damaged in the sector so that block is not used to store data on your system , but we can use the filesystem blocks that have (allegedly) bad. If the block is not really damaged, any data that we put there will never be touched, because the filesystem thinks it's rubbish. If the block is not really damaged, the data we put there will never be touched, because the system thinks the same garbage files. That, is exactly what we will do.


Partition must be small to contain confidential data and not to a partition larger than 100MB Agr did not arouse suspicion. Some operating systems mark blocks as bad blocks used, which means if we put inside a 100MB partition with bad blocks, the "parent" filesystem will always have at least 100MB in use. Some operating systems marks bad blocks as used blocks, which means that if we put a 100MB partition on the block bad, "parent" filesystem will always have at least 100MB in use. This could arouse Suspicion when there are not any files on it. This can lead to suspicion when there is no files in it.

I will use 256MB flash for illustrative purposes

Here's what sfdisk has to say about it: This is what sfdisk to say about this:


$ sfdisk -l /dev/sde


Disk /dev/sde: 1009 cylinders, 9 heads, 56 sectors/track
Units = cylinders of 258048 bytes, blocks of 1024 bytes, counting from 0

evice Boot Start     End   #cyls    #blocks   Id  System
/dev/sde1          0       -       0          0    0  Empty
/dev/sde2          0       -       0          0    0  Empty
/dev/sde3          0       -       0          0    0  Empty
/dev/sde4          0       -       0          0    0  Empty


We could see the flash is composed of cylinder 1009. we can make about 20MB, which is approximately 82 cylinders on this disk (see the second row sfdisk-l). Because we can not create a partition at the beginning of the disk, let us put in 214 cylinders:


$ sfdisk /dev/sde << EOF
214,82,6
EOF


Put FAT16 on it and transfer your secret data.


$ mkfs.vfat -F16 /dev/sde1
mkfs.vfat 2.11 (12 Mar 2005)


$ sfdisk /dev/sde << EOF
0,0,0
EOF


$ mkfs.vfat -F16 /dev/sde1
mkfs.vfat 2.11 (12 Mar 2005)


$ sfdisk /dev/sde << EOF
0,0,0
EOF

Creating Bad Block. Visit http://blog.crowdway.com
Good luck
Read More...!!

Configure Dual Monitors with nVidia on Ubuntu Jaunty (9.04)


Make sure that the nVidia driver has been installed and is functioning properly on your first screen. Also, make sure both monitors are connected.

Open the command-line terminal Konsole and type:

 $ sudo nvidia-settings

Select "X Server Display Configuration".

You should see 3 boxes (2 if your card doesn't have an S-Video out). From here you can configure all of your card's outputs.

Check the "(Disabled)" box.

  • Select "Configure...".
  • The most common choice is TwinView. Select it.
  • Setup the desired screen resolutions and positions of your two active displays.
  • The new display will likely have resolution set to "Auto" to match your first. Change this if you wish.
  • Leave the first screen's position as "Absolute" and set your second display's position relative to that.
  • "Clone" means the same output on both.
  • Once you are satisfied with your settings, hit Apply to test them.
  • Note: if your displays are side-by-side, the kicker may extend across both screens as well as any maximized applications. This will be corrected when the X server is restarted.
  • f everything else is ok, hit "Save to X Configuration File". Now hit Ctrl+Alt+Backspace to restart X. You now have 2 screens!
  • The NVIDIA X Server Settings application can be also found in K -> System Settings to change settings later, but this does not always work because settings need to be changed as the root user.)
  • Troubleshooting: if the X server fails to reload you can recover your old X configuration. In a terminal:
 

$ sudo cp /etc/X11/xorg.conf.backup /etc/X11/xorg.conf

Sources :

http://ubuntuguide.org/wiki/Ubuntu:Jaunty
Read More...!!

Recover Username and Password and Fix Grub 21 Error in Ubuntu

Recovering Your forgotten username and password

If You just installed Ubuntu and forgot what password you selected during the installation process or one of your friend gave you ubuntu computer without giving username and password.This tutorial will help you to recover username and password

1) Turn on your computer, and as soon as you the Press Esc to enter grub message, press the escape key.
2) Select the option that says (recovery mode).
3) Your PC will boot into a shell. Once you get a command prompt, type “passwd username” where the username is your username. If you can’t remember your username, then you can type “ls /home” which should bring it up.
4) Enter a new password when prompted, and again when prompted again Type “shutdown -r now” to reboot your system,

That’s it. You should now be able to login with your new password.

Fix Grub 21 Error in Ubuntu

Problem

I’ve just tried installing Ubuntu but when it restert for the first time, GRUB returns an Error 21. I know this means that it can’t find the grub.conf file, but I don’t know how to fix this. I used Windows XP’s Recovery Console to get back into XP, but I can’t access the GRUB files.

Solution
1. Boot your computer up with Ubuntu CD
2. Open a terminal window or switch to a tty.
3. Go SuperUser (that is, type “sudo -s”). Enter root passwords as necessary.
4. Type “grub
5. Type “find /boot/grub/stage1″. You’ll get a response like “(hd0,1)”.
Use whatever your computer spits out for the following lines.
6. Type “root (hd0,1)”, or whatever your hard disk + boot partition numbers are for Ubuntu.
7. Type “setup (hd0)”, to install GRUB to MBR, or “setup (hd0,1)” or whatever your hard disk + partition nr is, to install GRUB to a partition.
8. Quit grub by typing “quit”.
9. Reboot and remove the bootable CD.

Note:- In the above procedure hd0,1 is an example it might be different in your case.


Source :
http://www.ubuntugeek.com
http://ubuntu-source.blogspot.com
Read More...!!